Tuesday, March 22, 2011

Prof. Crookshank's Traveling Medicine Show PREMIERED at the Lindsay Spring Fest on March 16th 2011!!!

Roll out the barrels... we had a barrel of FUN!

Prof. Crookshank had a warning for the Parents...
Prof. Crookshank's Traveling Medicine Show premiered on March 16th and played twice daily thru the 18th to wonderful crowds of people. I have been working for months preparing the show for the stage, making new props, designing new routines and writing new material. And all of the hard work has finally paid off.
3 Card Monte ... with 4 cards!
 The audiences really enjoyed the show and I felt GREAT playing Prof. Crookshank once again after a 20 year absence.
Drink my Miracle Elixer... it tastes so DAMN Good!
This Show was performed in doors without the Caravan (because the Caravan is still being built.) And the stage and set was put together just for this event.
My Miracle Elixer will make even a puny brain HUGE!
It was so much fun playing Crookshank on stage, he has aged well and is more corny and absurd than ever!
A disgruntled customer


Just a sprinklin' of my Elixer and the customer goes home Happy!
I am very excited about the Spring and Summer Season, now that I have got 6 Shows under my belt. The Show was a hit with people of all ages.
Making Crookshank Shampoo

A disaster thwarted by Prof. Crookshank...  
Prof. Crookshank has plans to take over the world! Now, just look at the pretty spiral.
This lady is trying out the Crookshank Vegetable Chopper.
 I am itching to get out with the Showman's Caravan and reeeeally do the Show in style! There are many adventures ahead!

Friday, March 18, 2011

Building a Showman's Caravan Part 8


Now that the under color has been applied to the Caravan, it was now time to start to add the top-coat and begin the aging process. The first color (purple) was applied because I wanted a strong color beneath the crimson that would really show through and look a bit out of place.
Ward adding the first layer of crackle finish to the side of the Caravan
 Ward and I started to add the crackle medium in LARGE doses, all over the Caravan.
I am adding crackle coat to the front
 We had to work fast and also did a few tests first, to make sure that we could crackle such a huge surface.
It was a tense hour as we applied the crackle, hoping to HELL it would work.
 Once the secret crackle medium was applied and begun to dry, Ward took a large spray gun and started to paint the top-coat onto the sides.
Applying the crimson top-coat
 At first we did not see much happening to the paint... but over an hour, it started to crackle reeeal nice.
Let the cracklin' begin!


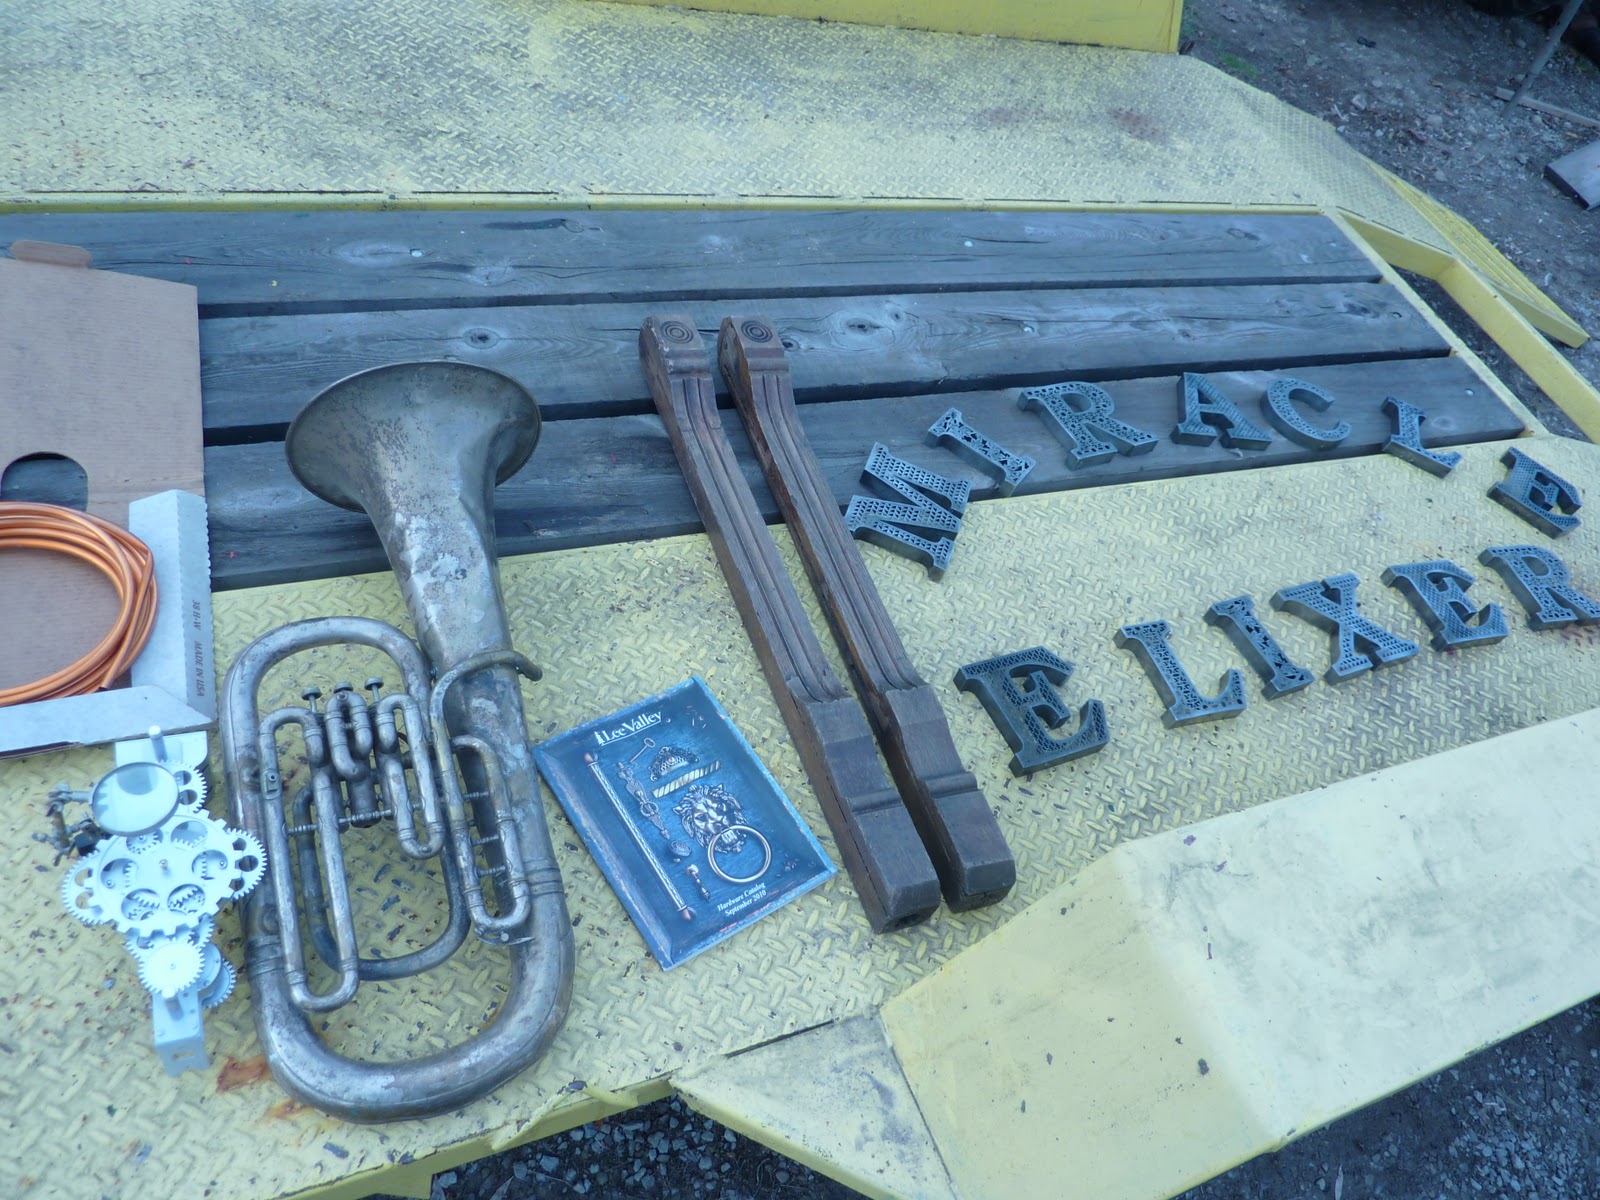
Lettering started and I have begun the aging process
We also designed and built doors to cover the mysterious machine when it was not in use.
EVERYTHING was made from scratch, NO store bought doors.

The doors were then painted and attached to the Caravan.
The doors are to be aged and strange images will be painted on them


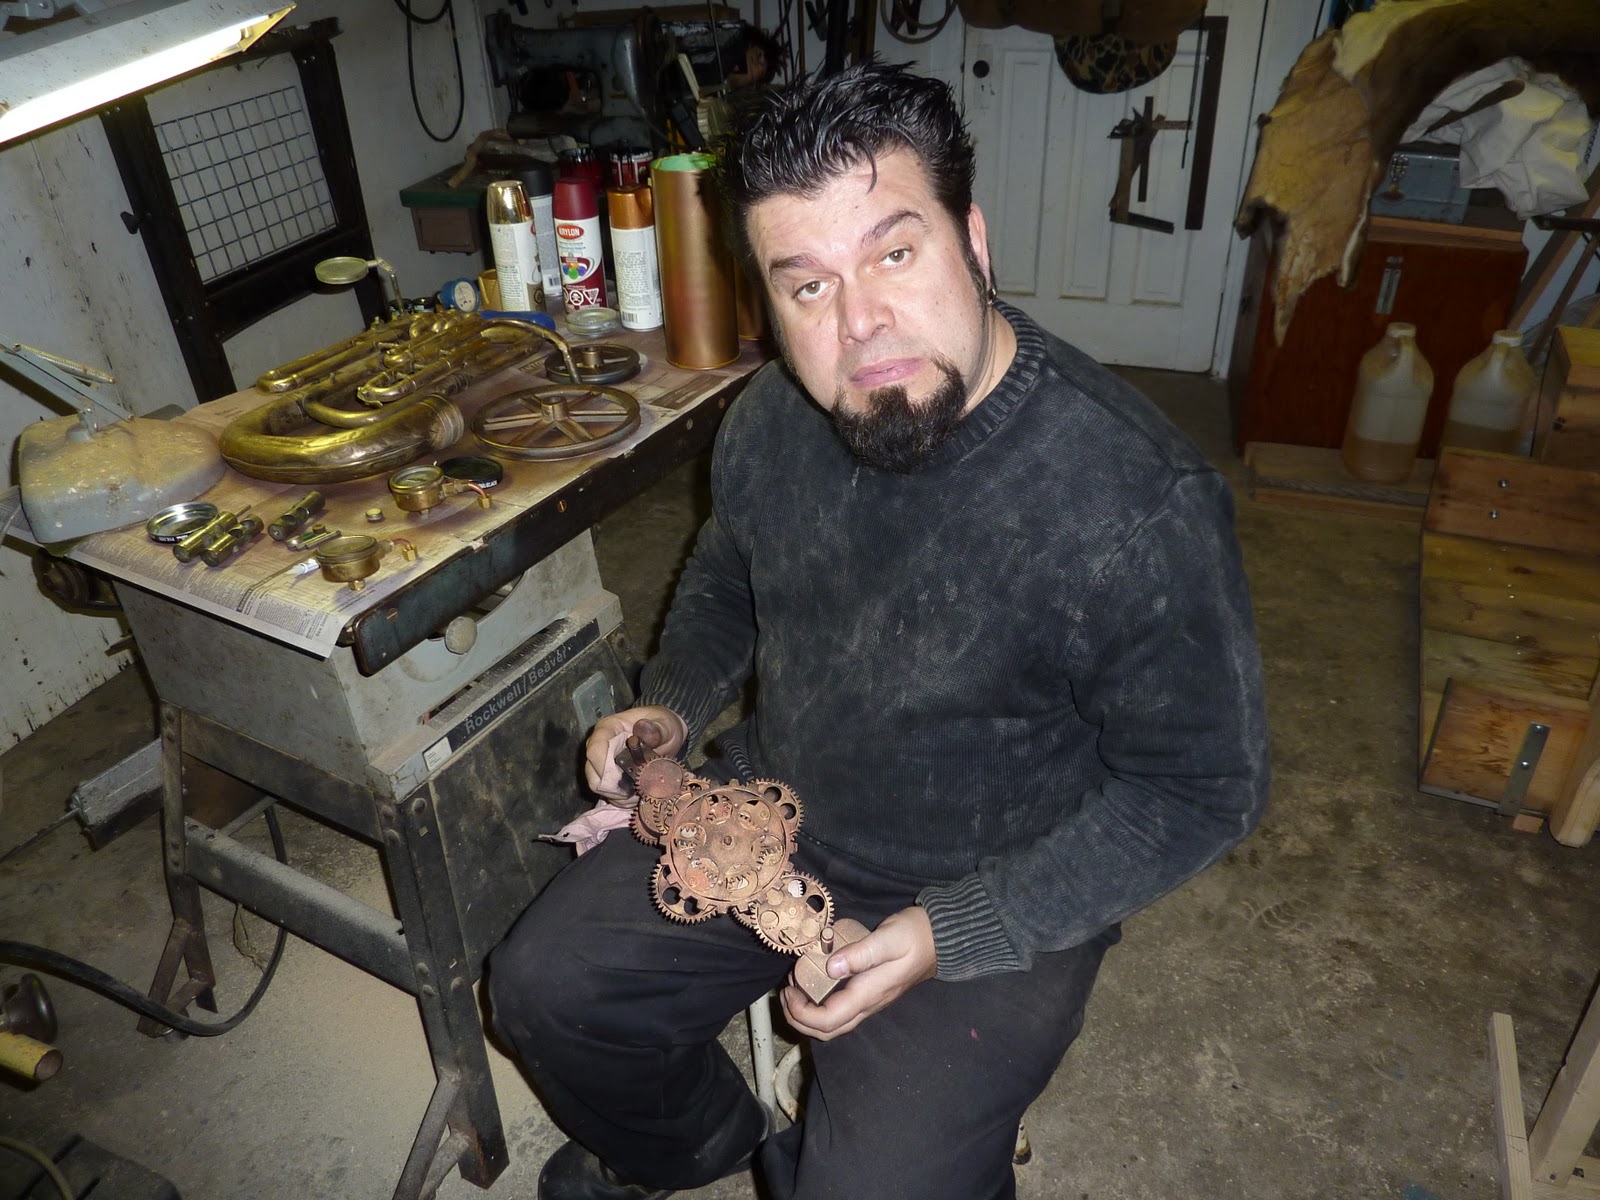
It was fun aging the Caravan, there were so many nooks and crannies to play with. And I added many different layers of subtle color into the cracks and wood grain.
This is just the beginning of the details to come....
The story continues in Part 9

Monday, March 14, 2011

Building a Showman's Caravan Part 7


With the bulk of the building completed, it now came time to paint and detail the Showman's Caravan. THIS is what truly sets a Showman's Caravan apart from a normal pioneering caravan... the ART in the Detail.

Painting the upper over hang before applying first color.
It was fun deciding what colors to paint the whole thing, because it was going to be a HUGE undertaking and there were many different tones that were going to be added to the paint job.

The FIRST color to be applied to Caravan
 My first major color was the 'under-coat' that would be seen through the 'aging process' that I was going to embark on as more and more paint was applied.

Laying down the very FIRST stroke of the primary color!

The painting starts in earnest...
  It was an electric time period laying down the first major layer of paint... because suddenly, the Caravan was not just 'wood' anymore, but a structure that had a character of its own. 
The back porch with first layer of paint
The Caravan with its First MAJOR layer of paint!
The process of painting was and is a long slow process, because there are many layers and treatments to the paint that are to be applied to the Caravan. I have studied old pictures of Gypsy Vardo's (Gypsy Wagon Caravan's) and I want my Caravan to have the detail and grandeur of the old Gypsy Vardo's.


Soon, the Caravan will be completed, and the FINAL REVEAL will take place!


The story continues in Part 8

Thursday, March 10, 2011

Building a Showman's Caravan Part 6

Now that the walls were up, it came time to design the back door that I would make my entrance from for the Show. I wanted this door to have a mystical quality to it (not like the WHOLE Caravan LOL) It had to look archaic, so I decided on an old castle design.

Sketch of Door shape on wood for frame
Back Door frame cut out
I salvaged reclaimed barn wood, old and gray and tougher then nails.
Door roughed out
Door cut

I aged areas of the door even more with paint to make it look even more weathered.
Aging areas of the door
I wanted to have a portal in the door that I could peek out at if someone came up the porch, again, something that looked almost medieval. I also wanted all of the detailing on the door to look very old, and so I hunted for great old iron pieces at antique shops.
Door ready for placement
It was fun putting the door into place, because it added a new dimension of character to the Caravan.
Door in place
Door looking from inside of Caravan
The story continues in Part 7

Sunday, March 6, 2011

Building a Showman's Caravan Part 5


Now comes the task of creating the site specific details. I wanted a strange distillery-like contraption on the side of the Caravan that would be revealed during the Show, and I had been tinkering with motors and moving parts, so that it would be moving and chugging all the time.
Gadgets and whirly gigs for the Machine
 I had found many different antique items and decided to patina and age them so that they all matched when put together as one large unit.
close up of the aging process
Once I had the Machine blocked out, I then had to box it, so that it could be properly framed into the exterior of the Caravan.
The Machine boxed (there were more details to be added later)
This was alot of FUN to do and I really enjoyed creating the components and piecing it all together. 

Once the Machine was boxed, it was ready to be put in the frame built into the Caravan. We had built a support frame system right into the wall structure, knowing that this was going to be a major show piece once all was said and done.
Machine locked into place

Machine and walls coming together
 As we started to put the side walls on, we decided to create a Secret Time Capsule that would never really be seen inside of one of the walls. Both Ward and I wrote and drew a pic that was eventually going to be walled up into the Caravan.
Secret Time Capsule Area
Me pointing at Secret Time Capsule room for the last time.
 And finally, we put up the major wall on the side and framed the Machine.
The side finished and ready for paint and detail!!!
Machine with start of frame and some Caravan detail
This was a major hurtle, knowing now that we could start to diligently work on bringing the Caravan to life! With the walls in place, we could now focus on all of the details that make a Showman's Caravan so Amazing!

The Story continues in Part 6

Thursday, March 3, 2011

Building a Showman's Caravan Part 4

Form and function.... that is paramount at this point.
I want to make sure that this Showman's Caravan can be pulled by a couple of large horses. So the next step is designing the front drivers area, so that there is enough room for the driver to sit without taking up to much room from the caravan living quarters. (And YES, eventually we will have a fully livable working interior!)
The front framed in
sitting in drivers seat
 Once the driver's area had been framed, we could then put the first of the walls in place. This was an exciting time... because now we could start to see a solid shape and begin to visualize the next steps even even more.
Front area filled in!
Front from a side angle, with cardboard valance (just playing with ideas)
With the front walls in place, Ward started to frame in the back door to the caravan.
The back porch was going to be VERY fancy, because I wanted a place to rest and sit during the summer days between shows that was cozy and comfortable.
Ward framing in back door
 This was a very exciting time, because Ward, Jess and I could see great potential in the design and were now looking forward to putting up the rest of the walls.

This part of the story is short, although it took a while for us to build these two areas. I stop here until the next installation of the story... because the next time we meet, we will be putting up the walls EVERYWHERE! and you will see the basic form of the caravan as a solid piece of equipment. 

THE STORY CONTINUES IN PART 5

Tuesday, March 1, 2011

Building a Showman's Caravan Part 3


One of the things that is going to bring this Showman's Caravan to life, is the details. Those little extra things you do to create something visually interesting.

Personally, I have always enjoyed this side of producing. For years I have searched Antique Shops and surplus stores for little bits of strangeness that would soon become a part of a project. Hell, I have boxes of gizmo's and weird little curios, just waiting to find a place in one of my contraptions or shows.

Disney said, 'Every DETAIL is important', and I believe this to be so.

I want the public to get as close as they want to the Caravan and see that no detail has been left out of the creation of this show piece.

One of the things I thought would be cool as a part of the actual caravan exterior, would be a Steam Powered Distillery, that would be revealed during the show. and the thing that would make it most intriguing is, it would work. Gears, wheels and cogs would be moving constantly as it chugged out a strange steam from a smoke stack.
Some of the things I had accumulated for the Caravan
The idea has been in my head to build some kind of machine like this for years... and now, we have slowly built something that works.
Working on the Strange Distillery Machine
A close-up of some of the components to the Machine
One of the other things that make a Showman's Caravan, is the carved wood, so I have tried to find as many carved wood pieces as possible in my travels and also have tinkered with some carving myself.
Some of the wood detailing for the Caravan
The roof has some major trim going around the top that was put in place when we attached to ceiling to the roof.
First part of trim attached to the roof

Second part of trim added 
And with the roof done, the frame of the Caravan is now completed and ready for some walls.
The Frame is done!

TO BE CONTINUED IN PART 4